Hey there Love Bug,

With the Epcot Food & Wine Festival going on, I decided I wanted matching ears to go with my themed shirt for the events. After making several kinds of Mickey and Minnie ears, I realized I didn’t have any to match my favorite Epcot event! These were super cute and easy to make!
Here is what you’ll need:
- Corks (plenty of them! I used about 17-19 per ear)
- Hot Glue Gun & Sticks
- Sturdy poster board (I used a thick cardboard mail envelope)
- 1 Headband
- 1 (8.5” x 11”) Sheet of Thick Glitter Scrapbook Paper
- 1/4 Yard of Your Favorite Fabric
- 1 Spool of stringed sequins
- 1 Coffee Mug
- scissors
- marker or pen
- Place a coffee mug upside down on the sturdy cardboard and trace the circle twice. Cut them out. Glue both circles onto the scrapbook paper and cut them out again. One side of each circle should now be completely covered by scrapbook paper, while the other side is plain.
- Place the circles underneath the head band and measure where you’ll want them to go. Use a pen or marker to trace the cardboard pieces sticking out from below the headband. Cut this part off so that the bottom part of the circle is now the same dimension as the headband. This is where you will glue the circle onto the headband.
- I purchased corks in a little bag from Joann’s because I didn’t have any real corks. Whether you purchase them or have them stored from real wine bottles, you’ll notice that it is very difficult to cut through them. Click here to follow this tutorial on how to cut cork easily. You’ll want to cut them in half vertically once you remove them from the strainer and place them on the cutting board. The corks I purchased aren’t as long as a typical wine cork, so this is why it will depend how many you’ll end up using.
- Plug in your glue gun and make sure you have the plain side of each circle facing you. Glue the flat side of each cork down on the circles tightly together. I made a ‘brick wall’ pattern on mine (see image above). Don’t worry if the edges of the corks pass the side of the circles! You’ll actually want the cork to come off of the sides to ensure the pattern covers the circle completely. Complete this process for the plain side of the other ear as well. The reason you do not want to glue cork on both sides of the ears is because it will be too heavy and you’ll spend the entire day trying to keep the ears on your head. don’t worry though, the glittery back part is just as cute!
- Make sure the glittery part of each ear is facing you. Take a pair of scissors and cut all the way around the circle to remove any excess cork that is sticking out.
- Glue each ear to the headband. Use the spooled sequined string to glue all around the bottom of the ear (front and back). This will hide any imperfections by the bottom of the headband. If you look at the picture above, you’ll see that I used black sequined sting to match the color of the headband.
- Make a bow with your fabric and glue it directly onto the middle of the headband. I always like to put a little glue between the parts of the ribbon that touch the ears. This secures it in place and ensure that your bow will ‘stand up straight’. If you’re not sure how to make a bow, click here for a tutorial!
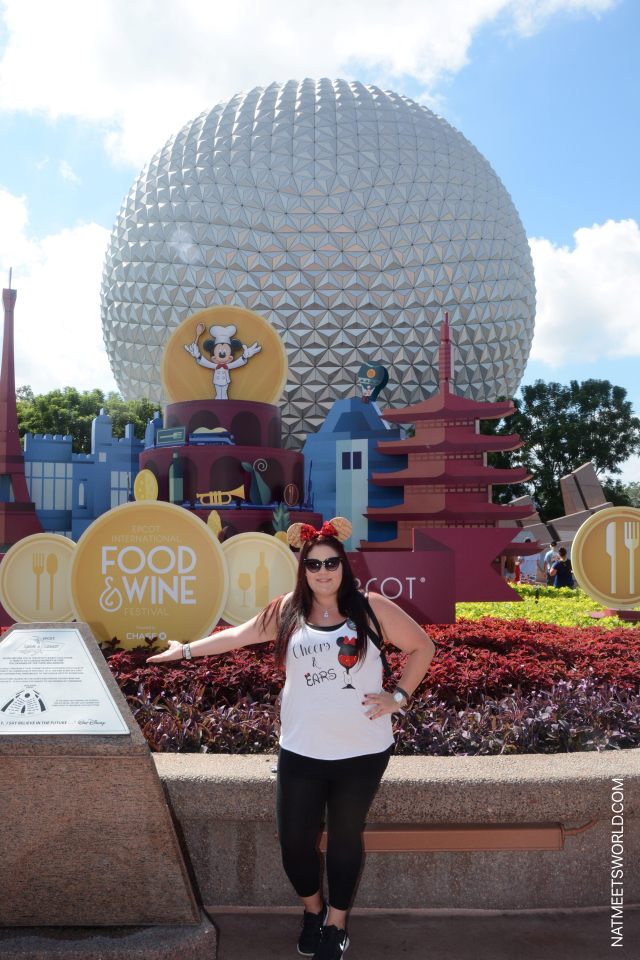
And there you have it! You’ll be ready to take on the flavors of each country at Epcot in no time….and look cute while doing so! If you haven’t already done so, check out my tips on how to make the most of your trip to the Food and Wine Festival!
Comments or questions? Just ask below!
XO, NAT
Disclosure: All images and opinions are my own. I am not affiliated with the other blogs mentioned in this post.


Leave a comment